

Secrets of the Old Masters: Glazing and Scumbling (Part 3)
- Jan 18, 2022
- 8 min read
Updated: Apr 12, 2023
Using Grisaille in Conjuction with Glazing
The glazing technique goes very well in combination with grisaille. When working in grisaille fine artists concentrate on depicting light and shadow portraying the three-dimensional nature of objects and environment. Grisaille is often painted in tints and brown on grey paints; deciding on the colours come later and can be done in glazes. The artwork completed in monochrome grisaille can be a finished painting within its own rite. Such pictures often resemble a black and white photograph, executed in oil paints. Grisaille underpaintings were usually done in brown colours or neutral grey. The old masters used grisaille on its own as well as preparatory oil sketches and most often as under-painting.

The grisaille under-painting for "The Torch Doth not Burn Turn"

The grisaille under-painting for "The Torch Doth not Burn Turn"

Jan van Eyck's grisaille painting for the Ghent Altarpiece.
Under-painting and how it complements the glazing technique
As a rule, the fine artist uses two main methods of making monochrome under-painting, the first method is painting in transparent layers, when the tonality depends on the paint dilution degree. The second method is based on opaque layers, where mid-tones and lights are achieved by adding white paint to the mix.
This gives a thicker under-painting compared to the first one. Sometimes the fine artist will use a combination of the two methods in one under-painting; these two methods are good for paintings on toned backgrounds. Using semi-transparent and transparent layers, the fine artist can work on mixing mid tones and shadows. On the other hand, by using the opaque method it is possible to work on mid-lights and lights. There are certain rules which need to be observed when working with the glazing technique. It is possible to finish with glazing in any given artwork however the best results are achieved when the picture is purposely prepared to be finished in glazing. Preparation for glazing artwork must be done in lighter and colder tones then the intended result will be; glazing layers will darken the painting surface and also shift the hue values in the warmer direction.
It is important to use a clean brush for glazing; if some opaque paint is left on the brush it can pollute the clear glaze transparency. When the glazing layer is applied, it is better to leave the artwork for a while to allow the diluents to evaporate before touching the glaze with a clean brush to even it out or spread even further. Natural hog bristle brushes are good for glaze application. Small details are better to glaze with small soft brushes while larger areas can be glazed with flat rounded brushes in bigger sizes.
Here are 10 rules that help you master the glazing technique:
1. Use oils with a higher viscosity for diluting a glaze mix
2. A single colour glaze can be used, as well as, a mix of two or more colours
3. Glazes can be used to increase the colour saturation as well as decreasing it
4. Lighter and more transparent glazes require lighter under-layers (when glazing on dark under-layers it is only possible to achieve a dark and deep glaze)
5. Multiple glaze layers can be applied in one artwork (keep in mind that multiple transparent layers will absorb the light-making the artwork darker)
6. An even application of diluted glaze can be achieved by using a soft brush, silk cloth, hand and so on. (Glazes with a higher viscosity can be applied with a stiffer hog bristle brush)
7. Every layer of glaze must be dry before applying the next one
8. Artwork can get darker over time if too much oil was used for glazes
9. A glaze layer can be wiped off, if required, before it dries
10. White paint is never added to transparent glazes (it blemishes the pure transparency badly)
Glazing can be applied on a smooth surface as well as textured under-layer. Depending on the under-layer texture the result will appear differently. Rougher textures can appear even more textured-looking.
Luminous Glazed Layers Reflect Lightly Differently Than Opaque Layers
The fine artist must keep in mind that areas of a painting made in glazes will closer to the viewer than an opaque layer of paint. This is because the light reflects differently from the opaque layer than when it travels through one or several layers of glaze. Fine artists would usually glaze objects that are in the foreground leaving the background opaque. That is why the sky looks more realistic and believable when painting in opaque without glazing. Semi-transparent glazing plays a very important role in oil painting, such glazing is done in oil paints that are semi-opaque or diluted opaque paints. Application of semi-transparent glazes has an interesting affect; when light semi-transparent glaze is applied on a dark under-layer the colour will look lighter and colder. When the same light semi-transparent glaze is a darker and warmer tint will be achieved.
Using this method, the old masters were able to achieve grey mid-tones in figurative paintings by applying light semi-transparent paints over dark brown under-paintings. Colourful tones of semi-transparent glazes produce colours that are otherwise not achievable by mixing up oil paints on a palette. Contemporary artists often use semi-transparent and semi-opaque glazes, they're not necessarily fully knowledgeable how glazing works but may instead apply it accidently or intuitively.
Jan Van Eyck: The King of Glaze- Glazing Done in Perfection
Specialists who have researched more than 300 samples of the Jan van Eyck altarpiece have discovered that to achieve the bright blue colour of the painted drapery the artist initially did 2 layers of an opaque mix of azurite pigment with flake white and completed the drapery with clear glazes of very expensive Lapis lazuli. Such an approach makes sense from a financial point of view, the lapis lazuli is more expensive than the gold pigment (weight per weight), therefore using it in an opaque under-painting would be a very costly exercise.

Lapis Lazuli: a very expensive blue pigment.

Ghent Altarpiece Painting (3.5 m x 4. 6) by Jan van Eyck created in 1432 with tempera and oil paint on wood.

Detail of Ghent Altarpiece Painting (3.5 m x 4. 6) by Jan van Eyck.
Microscopic research of the paint layers taken during restoration from various masterpieces dated back to the 15th century and created by the old Dutch masters reveal that the old painting method of multi-layers was used. Most of the top layers were done in glazes with pure colours without any mixing however the lower layers contain paints mixed with flake white.
Rembrandt's innovative impasto + glazing techniques
Rembrandt was a great master of the glazing technique,many of his paintings feature shaded interiors filled with multiple warm spots of reflected lights. Rembrandt was using glazes for backgrounds and then making impasto brush strokes with lighter colours to depict lights and highlights.


Rembrandt, as many other artists of the Dutch school was painting on white backgrounds. He used golden brown paints for under-painting, later on he began working on grey backgrounds using dark colour for under-painting. On top of an under-painting he often used alla prima method, making the painting surface a tone or two lighter to finish the painting in one or several layers of glazing. The shadows in Rembrandt's backgrounds are often semi-transparent while foreground objects are done in light opaque paints. Such a combination gives a dramatic and interesting contrast between the figures and their environments.

His paintings are renowned for deep transparent shadows done in glazes, bright accents of human skin and reflecting light on jewels, draperies, metal surfaces and so on.
Another great master, Titian, is well known for the virtuosic use of the glazing technique using a very limited colour palette he was able to achieve great creative results. Titian was using grey grisaille as an under-painting and then applied only 3 colours on top, such as: white, black and red. Dark draperies, hairs and other secondary details Titian often did in alla prima technique. The missing yellow hues were added on top as yellow tinted glazes, he applied the glazes with either his thumb or palm. Thirty-forty glaze layers on a painting was a standard approach. Later in his career, he developed another painting technique, he applied paints on a support with brushes, palette knife and his fingers. Transparent glazes of that period's oil paintings did not obstruct the under-painting, with this approach, the grain of the canvas sometimes shows through.
Peter Paul Ruben's Method of Glazing
Peter Paul Rubens was another renowned artist for his mastery of Flemish and Italian painting manner, his Flemish oil painting technique was based on brown under-painting. Lighter local tones were applied for mid-tones and mid-lights in blue-ish grey colour after which Rubens applied multiple glazes. Lights and highlights were done in opaque brush strokes on top of glazing.

The Adoration of the Magi(1617-18) by Peter Paul Rubens. It is now in the Musée des Beaux-Arts de Lyon
Scumbling
There is another technique which complements the old masters method, and can be used on its own or in combination with glazing-this technique is called scumbling. Scumbling is the application of a thin opaque or semi-opaque layer of paint on top of a dry under-layer. Usually scumbling is done in a lighter colour on a darker background. It allows the brightening of up of dark areas without completely concealing them. Scumbling produces a hazy, opalescent effect. Many of the old masters were using the scumbling effect, there were many paintings left from the past where opaque layers are thinly applied so that the under-painting shows through slightly.

The scumbling technique as shown above is the application of a thin opaque or semi-opaque layer of paint on top of a dry under-layer.
Similar to glazing, scumbling also works on an optical mix of colours because paints do not intermix between layers and the under-layers colours are showing through the top ones. Some of the old masters were using scumbling in portrait paintings; it softens the lines of a face and gives a translucent effect to skin. The fine artist has great control over how much layer can show through the scumbling layer, this gives tremendous flexibility over the colours and tones.

The scumbling technique is present in this detail shot of Rembrandt's portraiture artwork. Many of the old masters were using the scumbling effect, there were many paintings left from the past where opaque layers are thinly applied so that the under-painting shows through slightly.

Rembrandt subtly implementing the scumbling technique.

"Simon with Jesus" by Rembrandt in 1669. Rembrandtès use of scumbling is evident throughout the painting.
Nice soft gradations can be achieved with this method. Scumbling usually is applied with a brush, the paint needs to be undiluted. Sometimes it is better to extract excess oil from the paint. To do so, oil paint can be squeezed out of the tube unto newspaper, a paper towel or cardboard and when the paper or cardboard absorbs the oil from the paint the paint is then ready to be used for scumbling. The paint needs to be quite thick; this method resembles the dry brush technique where a small amount of paint needs to be loaded on the brush.
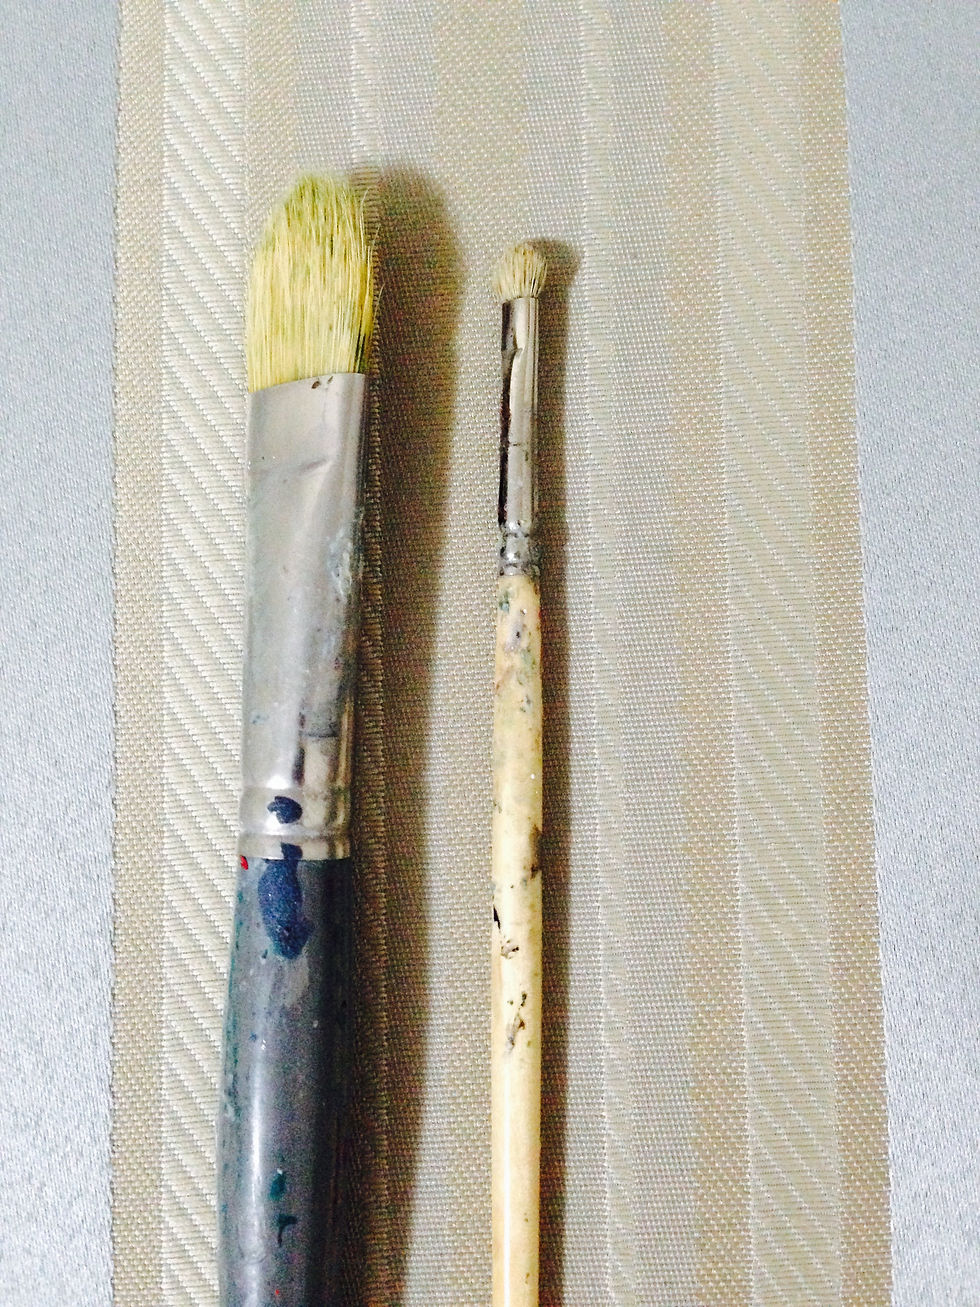
Natural hog bristle brushes are stiff enough to hold a generous amount of thick paint used for scumbling across a rigid dry surface.
Apart from the old bristle or synthetic brushes which work well for applying thick paint, scumbling can be done with palette knives, sponges, rags and hands. Scumbling can be done by scarping, raking or dragging the brush across the canvas and under-paintings irregularities to give texture to a painting. When applied with a rigid bristle brush, stiff paint sticks onto the top of the painted surface revealing the canvas or impasto texture. This creates an illusion of a depicted objects materials and its texture.Great effects can be achieved by scumbling clouds in the sky, or foam on sea waves for example. Scumbled areas are bright from the distance, but too much scumbling can make artwork look too flat or opaque. Scumbling can be done in any oil paint, however the best effects are achieved with the lighter and opaque paints.
For example naples yellow is particularly suited for this method when placed on a darker tone. Scumbling only works on top of a dry underlayer, and applying paint over a wet surface will result in physical intermixing of the paints colours on a canvas or board.

Some of Leonardo da Vinci's paintings featured scumbling used for highlights and soft gradations in tones. Rembrandt is also renown for using this technique, his scumbling applications in his portraitures show how realistically the skin is depicted.

the Virgin and Child with Saint Anne and Saint John the Baptist by Leonardo Da Vinci 1500


Comments